Sunday, May 22, 2011

3rd Birthday...Construction Style!

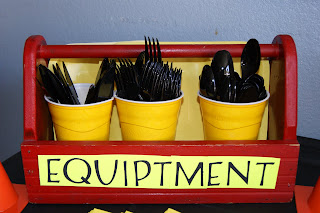
Our big man turned 3 last week! Rather then have a party with family, we opted for a party with friends, construction worker style :)
It was great fun and the kids really enjoyed it. I cannot believe we have a 3 year old! He will be starting preschool in June and is so excited. Now if we could only get the potty training down Id be one happy mama! Bryce knows all of his numbers, colors, shapes, letters, sounds each letter makes, speaks English and Spanish and can spell all of our names. Hes even started spelling 3 and four letter words! (The good ones). Hes very bright...Yea Im bragging just a little. Im a proud mom. He even wrote Mom and almost write Yiayia.
Here are a few fun photos from his birthday party!


Dirt (chocolate) cupcakes with graham cracker topping


The kids favorite activity. Covered boxes with red wrapping paper
and drew lines to make them look like bricks.

Another fun activity. I painted this on a black plastic table cloth.

Bryce's buddy Jace enjoying the water table


Cupcake time

Couldnt resist!

Monday, February 7, 2011

Knocked out a HUGE Must DO

Finally put up a bulletin board in our office. Hopefully these papers get off the desk and organized. I didnt want to put up just anything, so I covered one with fabric and ribbon.
Fabric I found at WalMart for $1.99 yard. Wasent sure what I was giong to do with it when I bought it...

Covered the bulletin board

Held it down using staples and hot glue. Also cut around the hooks.

Attatched ribbon and hot glued buttons in the middle.


*erin*

XOXO

Little girls have the cutest selection of Valentine clothes! Hearts and pinks and purples. Grr!!! So, I made my boys their own, and it came out cuter then all the girly stuff around :)

I found this polka dot fabric at Wal-Mart for $2.99 a yard. I bought two yards thinking I could find 100 things to do with it. I printed out the X and O on my computer using the Bold Ariel font.

I then pinned the X and O to the fabric and used it as a stencil to cut it out.


Once they were cut, I used fabric glue to glue the letters on the shirts. I find this helps them stay in place while I sew rather then using the pins to hold it in place.

TA- DA! Ok...I will not show you the botched sewing job I did. I am still new to this sewing machine thing. But from afar they look adorable! :)


*erin*

Sunday, February 6, 2011

Valentine/Birthday Cupcakes

While skimming through blogs at 2am, I found these Heart Shaped Cupcakes. They were so adroable and the concept was SO simple I had to make them.

I placed a marble on the outside of the cupcake wrapper


Baked them for 20 minutes

Let them cool

Added the frosting!!!


They turned out so adorable, were so easy and were such a hit!
*erin*

Thursday, January 20, 2011

Valentines=Birthday!!!

I love when Valentine's Day rolls around because that means my birthday is here too!!! One week before the love bird holiday. Sadly, I married a man who thinks Valentine's Day, my favorite holiday, is over rated. Come on! I know he loves me, but I want to be one of those girls who gets flowers and chocolate and is wined and dined too. Doesnt every girl??? He's slowly getting the hint :)

Here is my first, of hopefully many, Valentine crafts...

I bought 5 fabric quarters from the fabric store.

I cut them into strips that were an inch thick

I then tied them into knots around the entire foam heart wreath

Here is how it turned out. I like it...but I'm thinking of cutting the ribbon down a bit.

Love the colors. It's the only PINK thing in my "boy-filled" home.


*erin*

Pillow Covers

I am so proud of myself!!! I have actually completed something on my Wish List!!! Yea me. Today I took a trip to the craft store and bought some fabric. (I need a stash pile and this was the time to start). While I was there I bought the burlap I needed to do the pillows for the bed. I actually took my time this go around and measured out my material and pillows to an exact. I sewed them and printed out the iron on template I found on  This Blessed Nest. I printed the template on iron on paper and ironed them onto the pillows once I was done sewing them. Here is the final outcome!


A little assistance from my Love Bug

Material measured and ready to be sewn

Sewing the material
Final Product! Love it :)


*erin*


Wednesday, January 12, 2011

Slacking!

Ok...Ive done a ton of projecs but havent added anything to my list! Here is my most favorite...

I saw this tutorial on the Mod Podge Facebook site and happened to have the same exact stool that needed a facelift.
I took an old stool, with a slightly chewed on edge from our dog, and gave it a facelift!


First, I gave it a good sanding.
Second, I spraypainted it blue to match the color of paper I had chosed to Mod Podge it with.
I then let my two year old assist in the Mod Podging of the top of the stool.
I chose a piece o scrap paper that fit our liking and I cut it out to match the hole in the top of the stool.


Final Outcome.....love it!